
I first want to say that I am not a professional photographer or do I claim to know it all when it comes to taking pictures and editing them. I pretty much just know the basics and thought I would share the little tid but that I do know for any of you out there with an DSLR camera and have never tried shooting in RAW
When I first got my camera [Canon T3] I was super excited. I was taking pictures like crazy. Then I ran into this blog Mamarazzi [who sadly doesn't blog anymore] and she wrote this great post about shooting in RAW and I had to try it. Haven't gone back since. Shooting in RAW allows for the picture to carry more data and it gives you more leeway in the editing process.
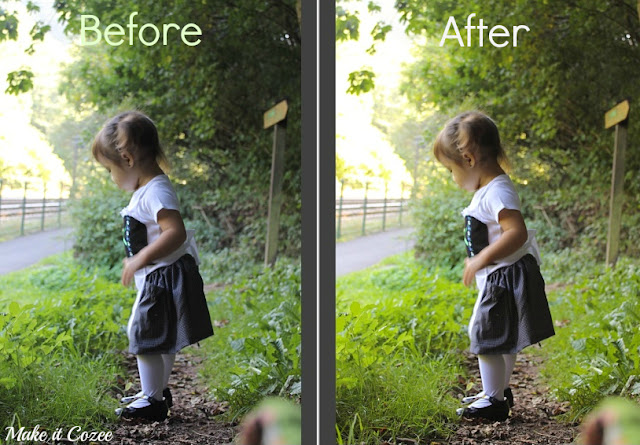
Just take this picture of my Boo in her Dirndl for example. The first one is a nice picture, but after brightening it and adding some warmth, the colors just pop so much more! The picture really comes to life and you don't have to be a pro do it.
Now let's get started shooting in RAW! On my camera I hit the Menu button and then Quality and change it to RAW. If you are nervous about shooting in RAW, my camera has an option to shoot in RAW and JPEG at the same time. It takes up more memory but then you have both files. 
Unlike JPEG files, RAW files have to be converted so when you pull the pictures up on the computer you won't be able to see them. They will only be visible on an editing program. Now you don't need a fancy schmancy editing program like Lightroom to do this. I just downloaded the editing program that came with my camera and it does all that I need it to do.
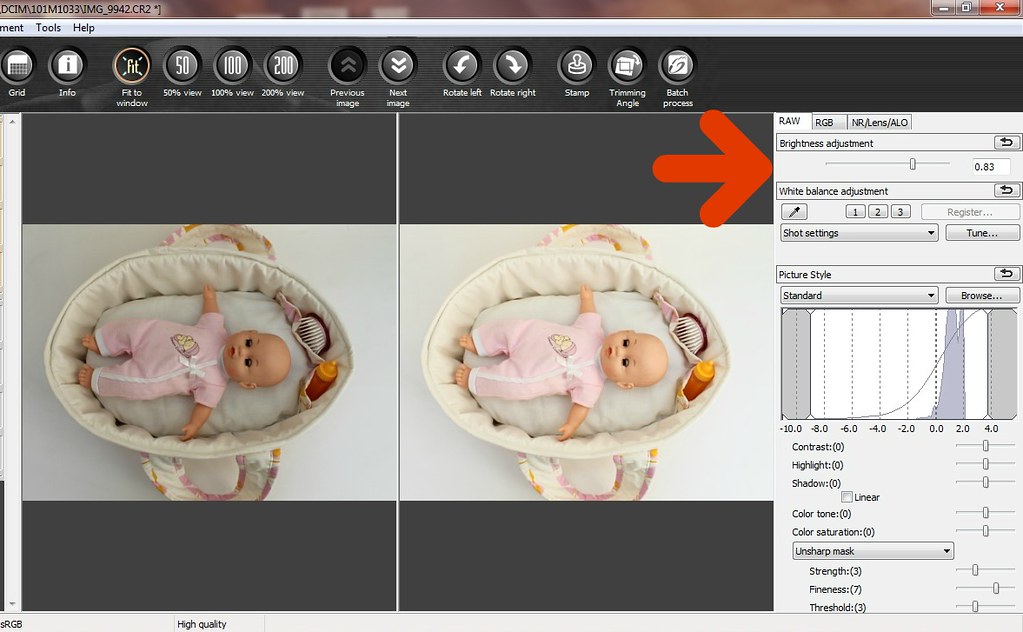
Let's first start with brightness. Sometimes, I don't have time to adjust the brightness on my camera before shooting. The great thing about RAW is you can do it after the picture has already been taken. See what a difference making this doll bed picture brighter. I know this can be done in JPEG too but not without losing a lot of the picture quality. It is just not the same. Trust me.

Another great thing about shooting in RAW is the ability to change the camera options after the picture has already been taken! Can't do that in JPEG. Let me show you. There are settings on the actual camera that allows you to choose your shot setting [daylight, cloudy, etc.]. Same with picture style [Standard, portrait, etc]. So, if it was a sunny day and you happen to forget to change this setting before shooting you can apply it to all the pictures afterwards.
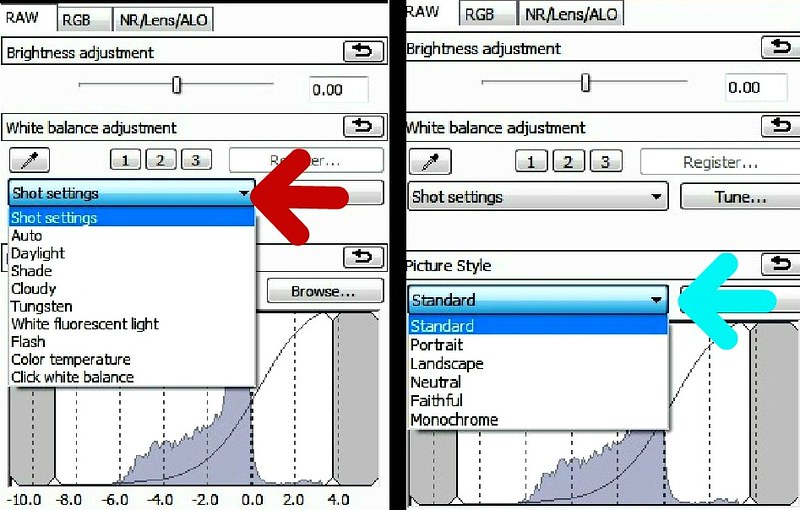
This picture for example was in a shady area. I changed the shot setting to shade and then I had a little fun and changed the picture style to Autumn because I love the way the colors popped with this setting [you have to click browse on the right to get the other picture styles].

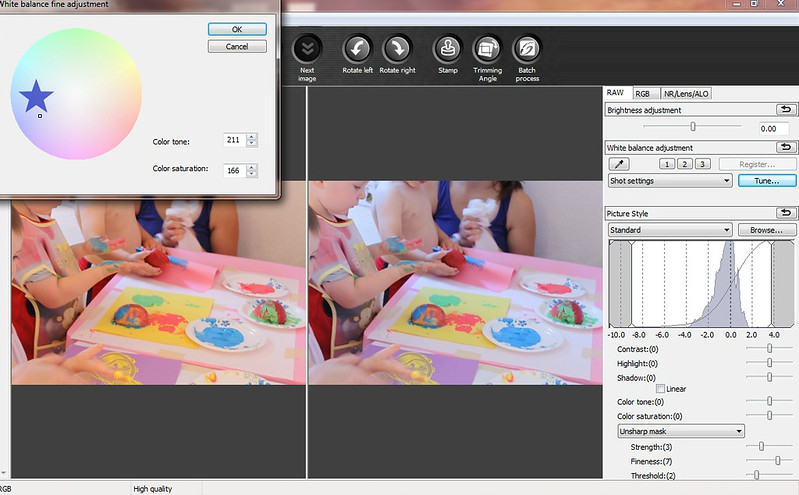
RAW files also gives flexibility with the White Balance. White Balance is the shade of white in pictures. The quick way to do it is by using the dopper. When I shoot on a white poster board like I did with the doll bed, I can usually click and then drag the dopper on the white board. Click on any white portion and the colors fix themselves.

To manually tune your colors to how you want them to look, just click the tune button and the color wheel will pop up. The teeny white dot in the wheel is what you will move. If you move it closer to the yellow star section it will add more warmth. If you move it closer to the blue star section, your picture will look more cool with more shades of blues.
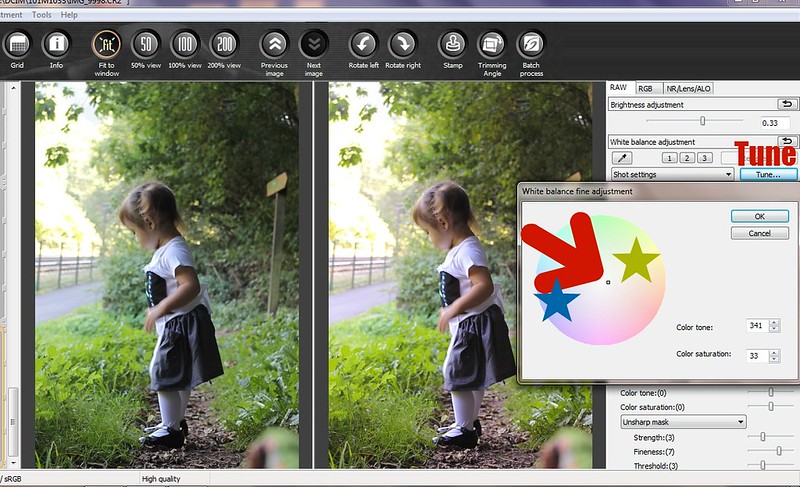
You get the idea, right? This is probably my favorite thing about shooting in RAW. Adding warmth and removing tints. Sometimes pictures come out with this yucky yellow tint. By moving that little white dot closer to the blue section, I can be rid of the yellow tints.
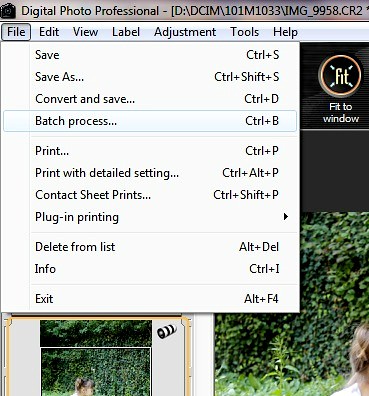
Pretty easy huh?! Now once you have finished editing all the pictures it is time to convert them to JPEGs. The nice thing about RAW is when it is converted to JPEG the file size is much larger so you can print much larger pictures then if you shot in JPEG. To process, click FILE and then select BATCH PROCESS.
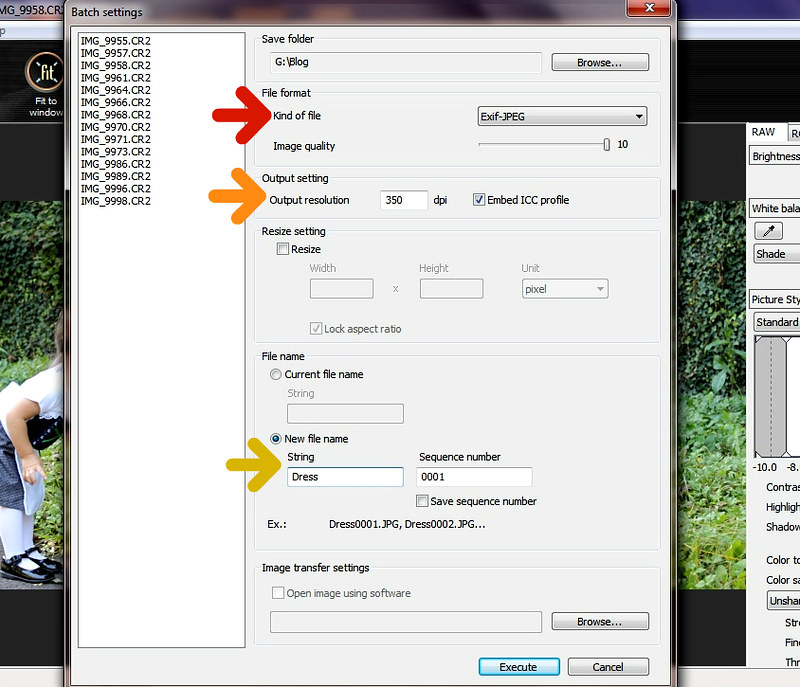
A window like this will pop up. Choose which folder to save your pictures in. Then, choose the quality of the picture and the resolution and choose the file name. Keep in mind that the higher the resolution and quality the bigger the file. When you are finished click execute and the files are on their way to becoming JPEGs.
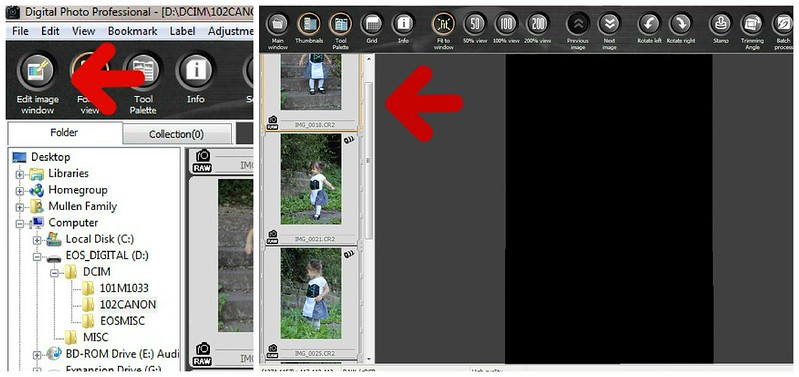
And one last tip for those of you using the editing program that came with the camera. You can edit a ton of pictures at once by selecting the images you want to edit [CLT + click]. Then click the top left option that says Edit Image Window and only those pictures will be ready to edited in the window.
I know it is a lot of information to soak up but the best way to learn is to do it yourself. So go take some pictures in RAW and give it a chance.


Wow! Thanks so much for this tutorial! I have never taken my DSLR off the auto feature since I got it, but now I am going to try this!! I can't wait to try it!
ReplyDeleteDawnn