Slider

Recipe: Banana Ice Cream

Monday, April 30, 2012

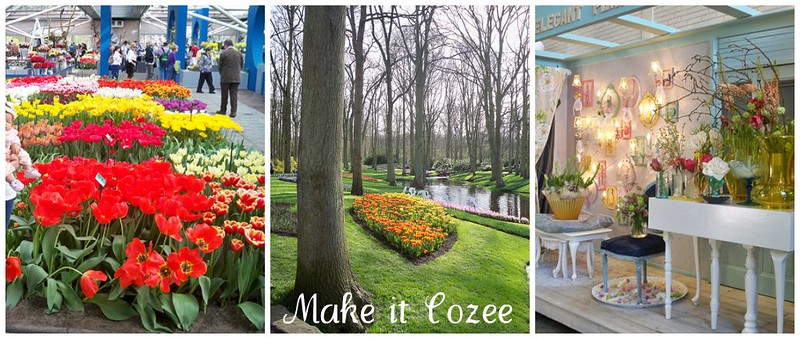
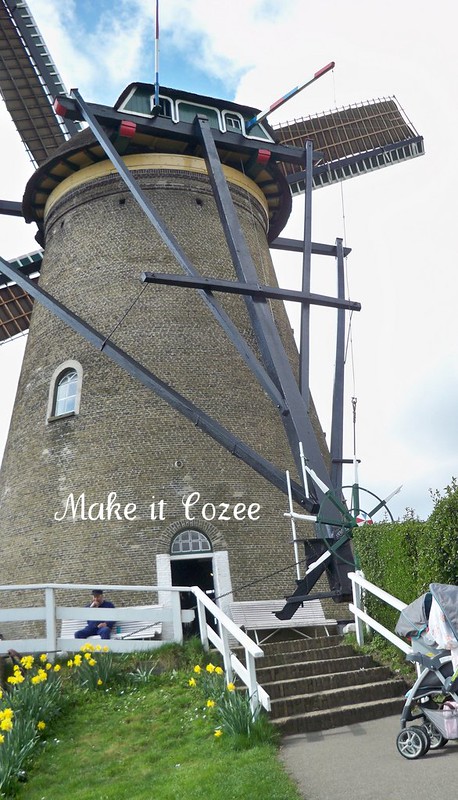
I'm back!!!! From vacation that is and as great as it was I am happy to be back to the real world.  We had a wonderful time in ..... well I'll share more on that soon.  During those two weeks, I truly did miss blogging and crafting.  I feel like I am behind on everyone's to-do's.  I'll catch up though.

Since it's just day one of being in the real world I am going to make this a quick one.  This recipe is ridiculously EASY, there are many ways to give it pizzazz, it taste so close to ice cream, and great for the babies and health nuts!  Cindy can eat a whole banana if I give it to her in the form of ice cream.  She is most definitely my daughter.

All you need are some ripe bananas.  One is usually enough for her.  YUP that is it!  You will want them more ripe than these ones though. 

Peel, chop, place in a bowl and freeze.  Once frozen, give them time to defrost enough that you can break them apart.  Place it in a food processor [or blender I guess], and let it rip.  It will get all crumbly like so.

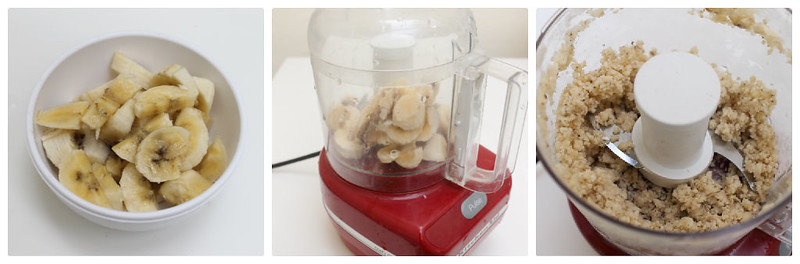
Mix it up a bit until it comes together and starts looking like ice cream.  It tastes just like ice cream and  it is really good.  Just make sure your bananas are really ripe. 


 You can add some chocolate, Nutella, nuts, brownies, make an ice cream sandwich.  You get the idea.      Don't just take my word for it, go try it! 

DIY Hair Bow Holder [Pin it and Do it]

Friday, April 27, 2012

There are a million tutorials out there on the web for how to make one of these and if you have a daughter with a million hair bows, it is a must.  I have a few pinned on my DIY board like this one or that one.  I especially love this one with the hooks to hang headbands!  You can really get creative and not have to spend a ton of money to make one, just use what you already have!  I made this for about three bucks!  One day,  I will make her a really really nice one but this will do for now.

How, you might ask... well the hubby had an old white board he wasn't using so instead of getting a canvas or frame I just covered that.  We bought these curtains when we were putting together her nursery from Ikea and they were super de duper long so I had a ton of left over fabric when I hemmed them.  Plenty to use for this project.  

I undid the trim, cut here and there and turned it into something completely different.  The only thing I bought was some red and white checkered ribbon.  Not exactly my first choice when it comes to colors for a girl, but the doc was so unsure she was going to be a girl that I had to keep things neutral.  It still came out pretty cute though.

So, put your thinking cap on, grab what you have and get creative!  


Finger Paint Post Cards

Thursday, April 26, 2012


I am on vacation [yeay] so I'm going to make this a quickie.  We live really far from family and though there is internet I am a lover of snail mail.  I still try to get post cards from places we visit and send them home.  And who doesn't love getting mail?

So, just an idea.  I used Cindy's finger painting creation to make that paper Easter egg, but also to create post cards.  It's something nice for the grandparents to get and hang up on the fridge.  A little something just from her.

Something that she actually made for them... When she is doing this, I just hold up the little post card for her to paint on.

They are actually water color post cards that look like this.  You can get a pack of 15 from amazon for about $7 HERE.  I got them as a hand me down [score! thanks Auntie Marlaine].  I am sure it is just as easy to make your own post card, just cut some card stock.  I know you can just mail a regular piece of paper but this is much more fun for me plus it is cheaper to mail.  When you are mailing out a few of these those cents add up fast. 

Kitchen Organizing Ideas [Pin it and Do it]

Wednesday, April 18, 2012

I have a whole pinterest board dedicated to organization and have gotten a lot of ideas from there.  I hate to call this a pin it and do it but I'm on vacation so I haven't done much hehe.

I don't know about you, but I have a small kitchen.  I only have one small silverware drawer [no joke] and a few cabinets.  It was a compromise I was willing to make because I fell in love with the house.  So, today I thought I would share some of the ways I learned to work around it and keep the kitchen organized.  

Have lots of pots and pan lids?  Yup me too.  I saw this in some magazine or something but I put all my lids in a plate drying rack and it works perfectly.  

Recipe: Aunt Coleen's Chicken Sandwich

Tuesday, April 17, 2012

When I was in Virginia, Aunt Coleen made this amazing chicken sandwich and it is going to be a regular lunch option for us.  I love it, the hubby loves it, and it is healthy [thanks Auntie]!  She put it on this super good wheat bread but I couldn't find it... Oh well.  Doesn't it look so good anyways?  

Here are all the yummy, fresh and healthy ingredients you need, I don't measure, I just add how much of each depending on how much I like it:

Mush the avacado and add a teensy bit of salt.  Spread it on the bread [I like lots].

I used canned chicken in water but you can use left over chicken or rotisserie chicken.  Add mayo and all the healthy goods, plop on top and pair with some fruit.  YUM!  Good to the last bite!  Sure beats the plain ol' chicken sandwich.

DIY Hangable Cleaning Gloves

Monday, April 16, 2012

Before Pinterest there was Martha Stewart.  Well, I still go to good ol' Martha because I love her products, her crafts, and gosh everything.  This includes her organization ideas.  While looking through magazines I remember seeing her with cleaning gloves with gigantic eyelets on them so they can hang inside the sink cabinet. I hate when my cleaning gloves sit out on the sink. Ick.

I loved it so much I had to do it.  I never use the dishwasher because before Cindy we never had enough dishes to really fill it up.  Well all that water on my hands really messes up my nails so I use these all the time.

This was the solution for me and here is how to do it.  I bought heavier duty gloves so they last longer and large eyelets.  It is important to get the really really thick gloves or else the eyelets will rip the rubber. Trace the hole for where you want the eyelet to be.

Then cut the holes out.  I know it is small but it's flexible so pinch down each of the metal pieces.  Super easy and I know these eyelets will be able to be used again so score!

Here is what it looks like on the other side.  Put the second eyelet in and there you have it, gloves you can hang!  Now, if you have wood cabinets, you have to remember to wipe your cleaning gloves dry before hanging because it could ruin the wood.

Sun Painting [Pin it and Do it]

Friday, April 13, 2012

Now that Cindy is old enough to actually sit for a few minutes and learn, my teaching gene has kicked into full gear.  I have been busy setting up her "classroom", downloading ipad apps, and pinning all sorts of educational thing.  I don't plan on home schooling, but I do want to teach her as much as possible before she starts pre-school.

Along with learning we need to have some fun too right?!  So along with the educational things you can find on my I <3 to Teaching board, I also pin some fun crafty things on my Baby Craft board.  We have a ton of windows in our house so I thought Sun Painting would be a fun one for her to do.  

You just put paint in a giant zip lock and tape it down to the window.  I didn't have anymore big bags so I used three little bags. Then you let them go for it.

As you can see, Cindy was getting really into it and slapping the bags haha.

It's a really easy activity, really fun, and if you have older toddlers you can even write letters in the paint.  Or, this would be a fun way to talk about mixing colors to crate new colors or do the colors of the rainbow.  Something we will be doing again for sure.

  So what have you been working on from pinterest?  Link up or send me your photos!!!

Spray Painting Furniture

Wednesday, April 11, 2012

I have recently been really into decorating the house.  People assume because I can do other crafty things that I must also be some amazing interior decorator as well.  Sadly, I suck at it.  I wish I didn't but I think one day I will just hire my best friend to do it.  But until then I have to figure it out.

One of the things I have been doing is painting.  This use to go in the living room but once Cindy started climbing on it I had to move it to the kitchen area.  I originally wanted to paint it a pale yellow but I am limited in color options.  I wasn't about to go to the German store and try to figure out which spray paint was the right one.  So, I settled for almond and even though it kind of blends in with the walls I am happy.

If you are wondering how it looked before here are the before pictures.  See how the cherry stuck out like a sore thumb.  Ick.

And now it fits right in with all the other pieces of furniture in our dining area.  I love it.

I am in a painting frenzy.  If you are getting the itch to spray paint something, be sure to check out THIS blog, All Things Thrifty for some tips.  She even has a video on how to spray paint properly.

Recipe: Corn Salad

Monday, April 9, 2012

The other day I was talking to cousin Krista on the phone and she was mentioning this salad to me.  After that conversation I had a huge craving for it, asked for the recipe, and now it is one of my favorite salads.  It is perfect for spring/summer BBQ.  It has this refreshing taste, the dressing is oh so yummy, and aren't the colors gorgeous?!

It tastes as good as it looks and even though the recipe calls for grilled corn, the canned stuff is just as yummy.  Here is the recipe:

2 cans of corn
1 Avocado, diced and sprinkled with lemon
1 cup of tomatoes, red and yellow cherry [I could only find red]
1/2 of a small onion finely diced
1/4 cup of crumbled feta [I added more]
1/4 cup of cucumber

Add to a large bowl and refrigerate until ready to use.

Cilantro Vinaigrette
3 tbsp. Olive Oil
1 tbsp. Sherry vinegar [I used Red Wine Vinegar]
1/2 tsp of Garlic Powder
1 tbsp of fresh cilantro, minced
1/4 tsp of salt
5 grinds of fresh pepper

Add all of the above in a small glass jar with a lid, shake really well.  Taste, adjust to your desire.  When ready to serve the salad, add the dressing and gently toss.

You will not be disappointed with this salad!  Thanks Cousin Krista for sharing.

What's in Your Basket?

Saturday, April 7, 2012

I meant to share this sooner but well I guess you could use it for next year or some last minute shopping.  I pinned THIS pin of 100 Easter Basket Gift Ideas and thought it was a great compilation of items for kids and teens.  I much prefer making my own basket because the store bought ones always have stuff I could care less for and I hate paying money for that.

So this year in Cindy's basket I pulled some stuff from the list.  I got her a book but this year it isn't an Easter one just one for her and Daddy.  She is getting bubbles, the paper egg I made, a new sippy cup, this push toy elephant I got for .77 [score!], a stuffed chick, and some plastic eggs with snacks.  And you wouldn't believe how easy it to make your own paper foe grass.  How much do you want to bet she will play more with the paper grass than anything else?

Last year, she was only two months old so I filled her basket with head bands I made hehe.  I ended up eating all the candy. 

Talking about Easter baskets brings this thought to my brain, wouldn't it be so fun to do a themed basket?!  Like one filled with arts stuff; crayons, markers, paint, paper, etc.  Or a baking basket filled with items for us to use baking Easter cookies along with an apron.  I will for sure have to try that next time.  So what's in your basket? 

Paper Carrot Garland [Pin it and do it Friday]

Friday, April 6, 2012

To my surprise people actually are getting inspired by Pin it and Do it Friday and it makes me oh so very happy.  So here we are again, Friday and time to do another pin.  This week my friend Celia shared a pin that she did and it is so cute I had to recreate it!  You can find the pin here.  It's a carrot garland!  Adorable right?!  Just ignore that one crazy carrot in the middle.

Bunnies and Chicks made from Oreos

Thursday, April 5, 2012

I know I said this last time but I seriously will try to make this a quick one.  Spring cleaning and a motivation to decorate has taken over my life.

I had all these crafts for Easter to do and I was really excited about this one.  Unfortunately, they did not come out as cute as I had envisioned.  I hate when that happens!  Oreo chicks and bunnies.  Still cute though and would look adorable wrapped with some ribbon in an Easter basket.

I do have some excuses for why didn't didn't end up as cute as THESE ones I pinned.  1. I couldn't find any big white marsh mellows, only pink ones.  2. I couldn't find any pink sprinkles.  [The commissary is limited].  3. I used white chocolate chips instead of candy melts [big mistake].  Candy melts is so much smoother. 

Anywhoo, I just melted the chocolate and coated the cookie really well leaving it on wax paper to dry.  

For the chick, I colored the chocolate yellow and I made the beak from orange melted chocolate.

Okay so the white chocolate isn't as smooth as candy melts so I turned them over and used the smooth side for the face. 

The ears were made by cutting the marsh mellow diagonally.  the sticky part is on top and if you have sprinkles, you can place them on top.  The bunny nose is a jelly bean and the eyes are dots from brown food coloring.  The chick eyes are Oreo crumbs.  All the pieces are placed on using melted glue. 

Next year I am going to try to bunny cookies!  Are you working on anything for Easter?

Easter Floral Arrangement

Tuesday, April 3, 2012

Keeping it kind of short and sweet today with some reminiscing because I have been super busy spring cleaning wondering when I got so much furniture!  It's not easy moving everything around to get those dust bunnies that have been hiding away all year. 

Anywhoo, onto the sharing so I can get back to work.  Thanks to cousin Krista, I was inspired to do an Easter floral arrangement.  How could I not when these flowers only cost $2.70 and about $5 for the entire arrangement.  I am not a florist but I had fun with this one.  I am actually really happy with how it came out too. 


I just used the peeps from the S'mores and some jelly beans I got for another project I will share another day.  First a layer of peeps, then I put the flowers in and held them in place, filled with jelly beans, then another layer of peeps. 

So go out there and get inspired!  I did thanks to this picture sent to me of the floral arrangements Krsita did for her housewarming party using Yankee Candle jars instead of vases.

I just love flowers and these tulips bring back happy memories of our family trip to Holland last year.  It is by far my favorite place so far.  Rows and rows of gorgeous flowers indoors.  Beautiful outdoor gardens and fields of flowers.  We even went to this exhibit where they did scenes with flowers.  This was one of my faves.

And it isn't Holland without gorgeous gigantic wind mills!

So are you feeling inspired yet?  Just go for it and do some decorating or even a fun floral arrangement.  

Blueberry Buckle Recipe

Monday, April 2, 2012

This week I have been getting in a lot of photos thanks to Pin it and Do it Friday.  Thank you so much!!  Keep the photos coming and I hope you continue to get inspired to create those things you are pinning.

I know this isn't an Easter-y post but things were crazy today and in between going to a million stores and cleaning for hours I just didn't get to finish any of the projects I have started.  I figure, this pie looks so yummy, you could make it for Easter.

Thanks cousin Juliana for sharing this recipe.  I will for sure be trying this one out because we love blueberries!!  Doesn't it look soooo yummy?!  And without further ado here is the recipe:
Streusel:
1/2 cup all purpose flour
1/2 cup packed light brown sugar
2 tbsp granulated sugar
1/4 teaspoon ground cinnamon
pinch of salt
4 tablespoon [1/2 stick] unsalted butter cut in 8 pieces and softened

Cake

1 1/3 cup of all purpose flour
1 1/2 tsp baking powder
10 tbsp unsalted butter, softened
2/3 cup granulated sugar
1/2 tsp salt
1/2 tsp lemon zest
1/2 tsp of vanilla extract
2 large eggs, room temperature
4 cups of blueberries [can get away with 2 cups]

To make the streusel: In a bowl of a stand mixer with the paddle attachment, beat the flour, both sugars, cinnamon, salt on low to combine and break up any brown sugar lumps.  With the mixer on low, add butter and beat it until it is completely incorporated into the dry ingredients, about 2-3 minutes.  The mixture will resemble wet sand. Set aside.

Preheat oven to 350 with the rack in the lower third of the oven.  Line the bottom of a 9in pan with a round of parchment paper. Then spray with parchment and the pan with non stick spray and flour. 

In a small bowl, whisk the flour and baking powder together and set aside.  In the mixer with a paddle attachment, beat the butter, sugar, salt, and lemon zest at medium speed until light and fluffy, about 3-4 minutes, stopping to scrap sides.  Beat in the vanilla.  Add eggs one at a time beating well after each addition.  With the mixer on low, gradually add flour mixture beating until incorporated.  Stir batter with spatula until thick.  Gently fold in blueberries.  

Transfer batter into the pan and top with streusel.  Pick up a handful of stresuel and squeeze to form a clump.  Break the clump into smaller pieces and sprinkle batter.  Continue until all streusel has been used.  Bake 45-55 minutes or until golden brown and a toothpick inserted in the center come out clean.  Transfer to a wire rack and cool for 15-20 minutes. 

Thanks Juliana for the recipe!!  Be sure to try this recipe and if you have done something on pinterest, send me a picture and I might just post about it. 

And if you have tried something on pinterest and documented it please share!

Paper Easter Eggs Filled with Candy

Sunday, April 1, 2012

There has been lots of creating going on in my house and I love it.  Even Cindy is getting in on the action!   Anywhoo, I am really excited to show you these darling little paper eggs I made for Easter.   Aren't they so cute?!

Powered by Blogger.
Theme Designed By Hello Manhattan
|

Your copyright

Your own copyright