Slider

Christmas Cards at Mpix

Wednesday, November 7, 2012

I confess, I am as bad as the department stores....  the Christmas season for me starts the day after Halloween ends!  I start planning crafts, decorations, gifts, lists, and of course Christmas cards!   Because we live overseas, I have to plan for cards way sooner than I normally would.

I have printed from Walmart, Target, Shutterfly, and Costco in the past.  I have to say that I have not been impressed at all with Walmart and Target's saturated prints.  I dislike Shutterfly's quality and of them all, Costco is my favorite.  I just hate having such beautiful pictures on the computer screen but horrible pictures printed. 

BUT this year, Pinterest has convinced me to try a new company.... The pin promotes WHCC but the site was too complicated to use.  I ended up spending my "Christmas card shopping" on Mpix.  They had so many beautiful choices of Christmas cards it was not an easy choice!  I had to make four samples and have my two best friends vote and help me decide.  Here are three of my faves.  


They also have cards with options to include pictures in the back.  I almost went with this option since our pictures didn't all "match".  You can have one main picture, turn the card over and add a few more.

Kudos to Mpix for letting you add text to the back of the card and not just the front of the card.  Just click the customize button and go crazy on the back.  I always hate the limited amount of words you can add to the front of the Christmas card.    This year, I got to add a verse on the front and a nice good sized greeting on the back.  No an extra charge too!  Love it!

I think the best thing about Mpix is their customer service.  I contacted them with a question and no joke received an answer in a few hours.  Great customer service, so another plus for them.  It sounds silly, but I am very picky even with the little details of the holiday like Christmas cards.  I can't wait to get the cards and some prints I ordered.  I hope to be singing their praises when I see the quality of the prints.  I will keep you all posted! 

Weather [and rainbow] Baby Shower Ideas

Monday, November 5, 2012

One of my dear friends is due to have her baby very shortly, which means it is baby shower time!  She is one of the sweetest mama's I have known.  I am teaming up with another mommy to give her the best baby shower we can possible have.  She gives so much to others, she deserves the best.  So for the past few weeks, we have been brainstorming, pinning and now we are a week away!  Eeeks!!  You can see our inspiration board on Pinterest here.

The theme she picked is so unique and I am loving it!  They have this weather theme with names in their family so we are having a weather themed baby shower.  Mainly clouds and rainbows.  The plan was to show you the invitations I made but I can't find the image so it will have to wait until next time. 

Until then, let me share what I have envisioned.  I like the picture below [Image found on pinterest].  Pom pom clouds with raindrops.  I love the cloud toppers on the straws and actually just made those.  And the clouds on the cupcakes.  Ahhh cuteness overload! 

I am also drooling over this felt cloud with the rainbow dots!  Love it and I know mommy to be does too!  [Image found on pinterest].

I also thought this was so fun.  Writing on diapers for the new mommy.  I would have loved changing diapers just so I can read what people wrote.   [Image found on pinterest]

Now, lets see how much of these tasks I can actually accomplish!!  Again, you can check out our board for other ideas.  Wish me luck as I lock myself in the craft room for a few days. 

How to Make Slime

Friday, November 2, 2012

When I was a kid I vividly remember playing with GAK.  Watching Nickelodeon, wishing I was the kid getting slimed on TV, and playing with GAK.   I use to love that stuff and who am I kidding, I still love playing with it.  I can't believe how easy it is to make!!  

We made some at the Halloween party and I think the kids were too young to really appreciate it.  They looked grossed out and a some were a little mortified.  It took my little one a few days to warm up to the stuff. 
To make it easy, I pre measured everything.  

In the cup I mixed 1 teaspoon of Borax powder and 1 cup of water.  The bowl, has 1/2 cup of white Elmer's glue, 1/2 cup of water and some food coloring.

All the kids had to do was pour the water into the bowl and mix.  In seconds you will start to see it form.  The blob grows.  Pour out excess liquid and start kneading the slime until it isn't watery anymore.

It took some time and coaxing to get the kids to touch it.  I think us moms enjoyed it more.

Just a note, you can mix two different slime colors to make a new one.  It was still really fun to make.  Now, fast forward to my Tuesday night Bible study.  I tried this activity with my 4th and 5th graders and they went nuts.  They loved it and thought I was the coolest teacher ever.  Ha!  What a contrast to the itty bitty ones.  Keeping this recipe in the books for sure for when Boo Bear gets older!

Hope you and your little ones enjoy it!

First Halloween Party

Thursday, November 1, 2012

Wow Halloween went by in a blink of an eye!  Hope everyone had fun and got lots of candy!!  My intention was to share tutorials of the things I made for but with our vacation running so close to the party I just didn't get the chance.  I did want to share the highlights of the party though.  Maybe you can pin some ideas for next year.  I already have a list of things I want to do next year that we didn't do this year.  You can check out all my inspirations on my Halloween Board on Pinterest.  

It was our first Halloween party and I was limited in time, so I kept it simple and most of the decorations were made from paper from my ever growing scrap book stash.  Not too shabby I would say.  The ghosts are from this pin on Pinterest.  They only took minutes to make and look so cute!  
                                                                         

I also am in love with these fun paper banners.  It seriously was so easy to make, hardly took any time and looked so cute!  I just punched circles out and sewed them together.

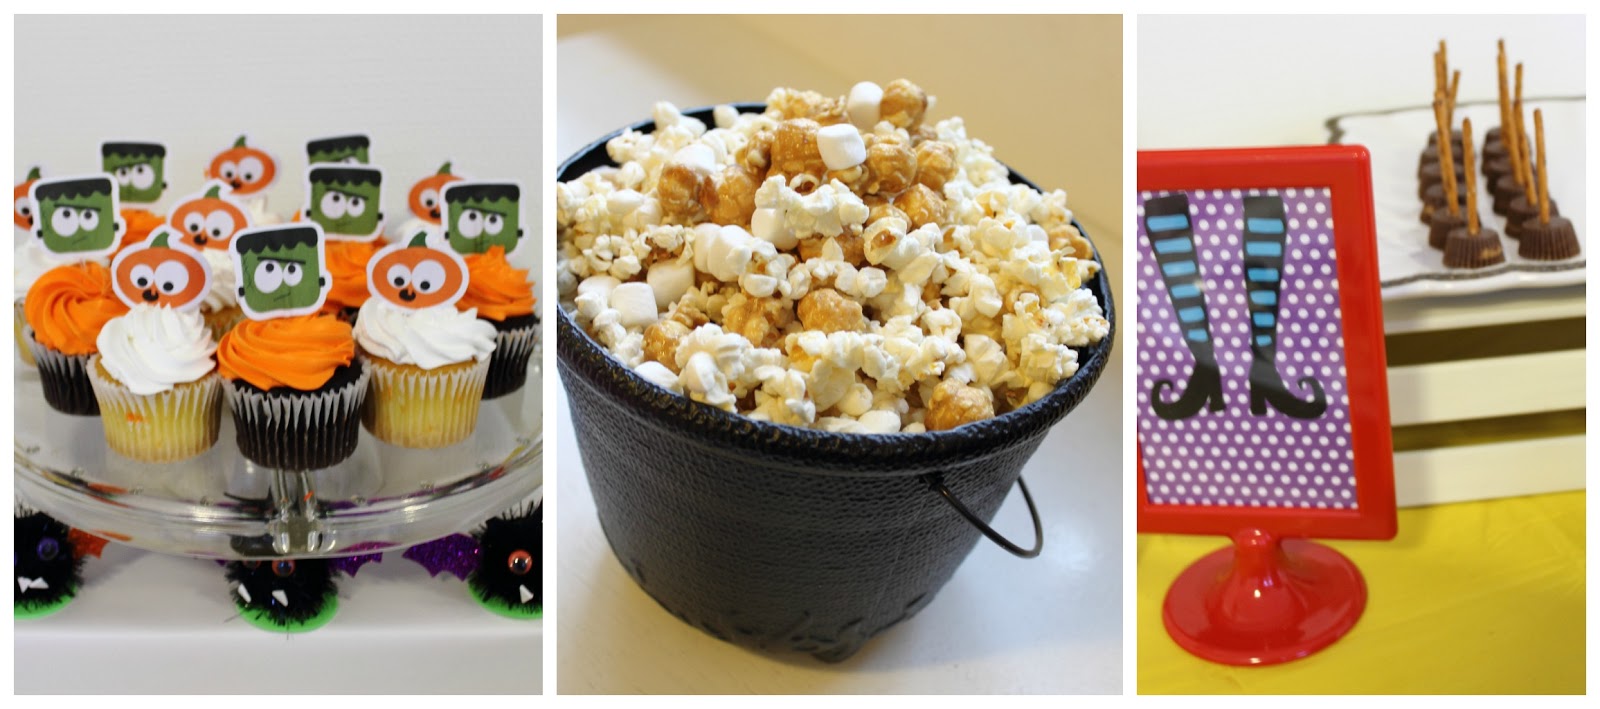
And on the food table were some fun treats!  The witches brooms were a hit.  And look, I used those 99  cent Tolsby frames from Ikea!

These were my favorite Halloween treats.  Deviled eggs with olive spiders from this pin and the bone biscuits with blood aka marinara sauce.  This pin led me to a great site with all sorts of great food ideas!

Some of my favorite decor was on the other side of the room.  I painted characters on those $5 Ikea side tables.  They wash off nicely too if you use washable paint.  And remember those candy corn pillow covers?  Definitely saving those for next year.

My favorite decor has to be the bats.  Just plain black paper.  You can find the print out here at one of my favorite blogs.

I have joined the paper straw and mason jar trend.  I taped some felt to my yellow tray to make it look like a candy corn.  The "mummy" utensil holder is really just a tin can wrapped with gauze and embellished with googly eyes.  Simple but charming.

One of the mom's made gift boxes for the kids.  Remember those hands filled with popcorn?!  Well she filled these with gold fish to make them more toddler friendly and added rings to the fingers.  So clever.

We had a full house and it was fun!  The kids played, the mom's talked about potty training.  We even made slime [more on that tomorrow].  

And out of all the really adorable costumes I would have to say my dear friend is the winner!  She is preggo, so for Halloween she is a road with a bump [hehehe] and her son, the cutest bum I have ever seen!  Love it!
Hope you all had as much fun as we did! 
Powered by Blogger.
Theme Designed By Hello Manhattan
|

Your copyright

Your own copyright